Snowflake
Connect v0 to Snowflake to build apps and dashboards with your warehouse data, query Snowflake, and deploy apps to Snowflake.
The Snowflake integration is currently in beta. A team owner must configure a Snowflake account for your v0 team before members can connect.
The Snowflake integration lets you build data apps with the data your Snowflake role can access. After you connect Snowflake, v0 can inspect schemas, query tables, generate dashboards or reports, preview connected apps, and deploy apps to Snowflake.
How access works
Snowflake access is controlled by each member's Snowflake user and selected role.
Team configuration does not grant data access
A v0 team owner first adds one or more Snowflake account identifiers for the team. This makes those Snowflake accounts available as connection options in v0.
Adding an account identifier does not sign in any team member, grant Snowflake data access to the team, or change Snowflake permissions.
Connecting authorizes v0 for one member
Each team member connects their own Snowflake user with OAuth. When a member connects, they authorize v0 to use that Snowflake connection in chats, previews, and Snowflake deployments.
v0 has the same read, write, and delete access that the connected member's selected Snowflake role permits. If Snowflake does not allow the member's role to access or modify something, v0 cannot do it through that connection.
Connections are per member. Teammates do not inherit access from another member's connection, and they may be asked to connect their own Snowflake user before they can preview or continue work in a Snowflake chat.
Snowflake usage information
v0 sends information about your use of the Snowflake integration to Snowflake, such as a unique ID to attribute usage. That information is governed by your terms with Snowflake.
Prepare Your Snowflake Account
Before your team can connect v0 or deploy apps to Snowflake, a Snowflake account admin must enable the Snowflake App Runtime and grant the Vercel integration access to the roles that will use it. See Snowflake App Runtime account admin setup for full details.
Enable App Runtime
- In Snowsight, select your name in the lower-left corner, then Settings.
- Under Account, select Apps.
- If the page shows App development is not set up, click Begin Setup and complete the setup flow.
After setup the Apps page shows a Defaults tab where you can configure the destination database, schema, query warehouse, and the roles that have access to these defaults.
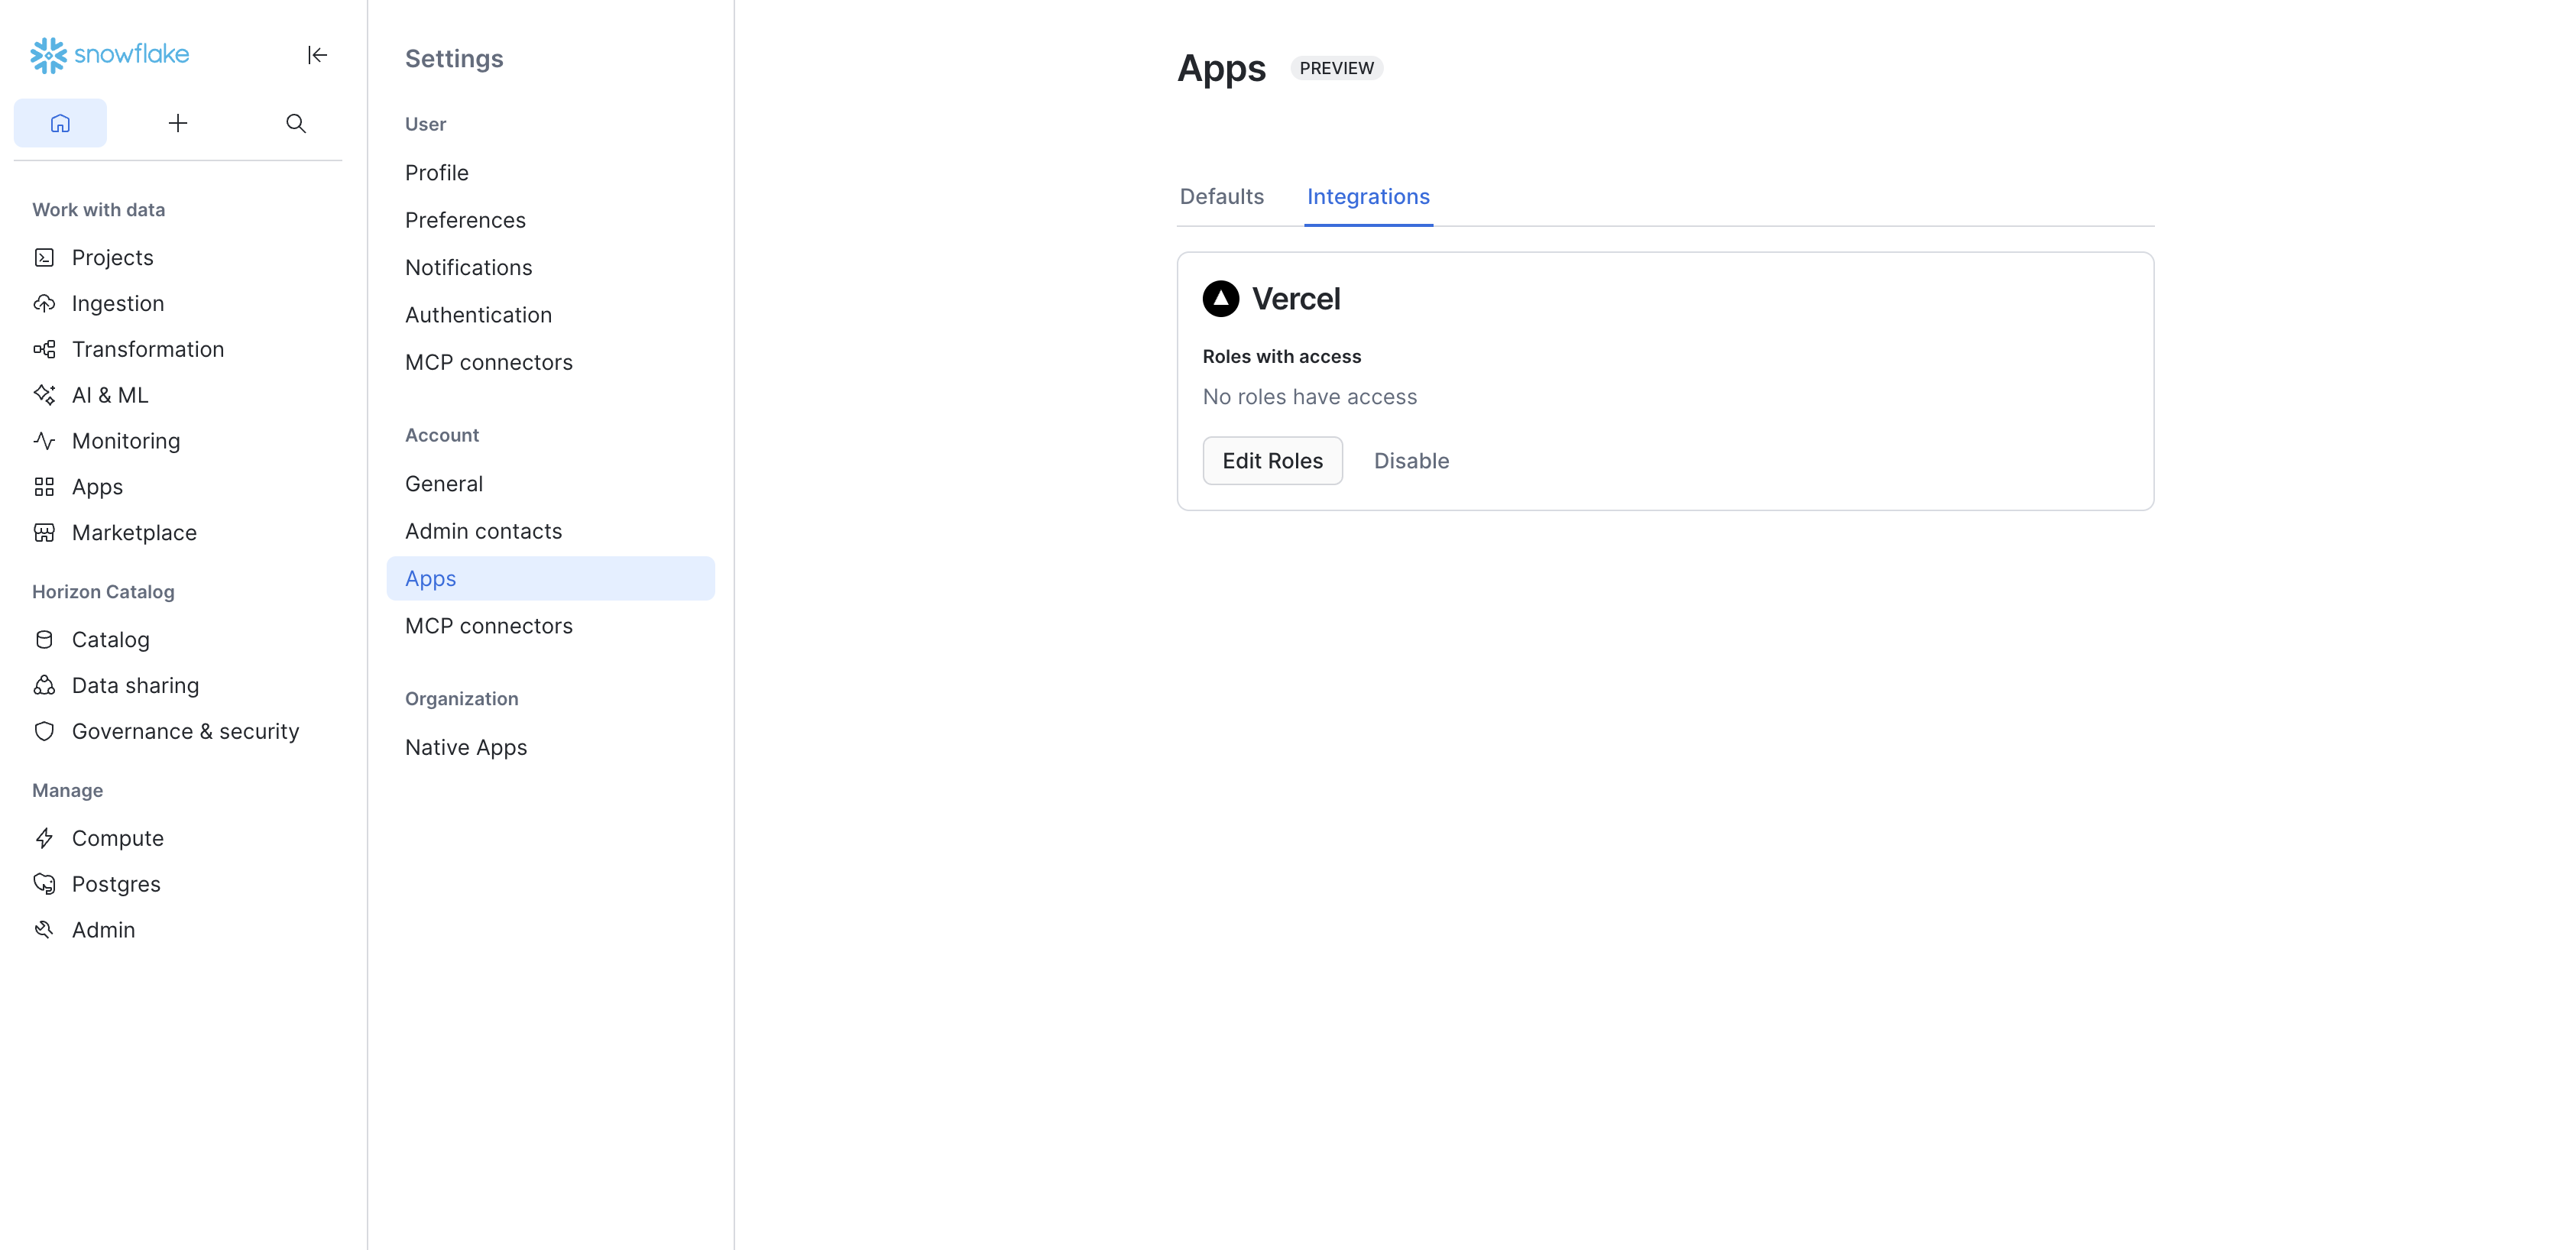
Enable the Vercel integration
- On the Apps page, click the Integrations tab.
- Find the Vercel card. If it shows Not created yet, click Setup.
- In the Setup Vercel dialog, select the roles that should have access to the integration.
- Click Setup.
The Vercel card will update to show Roles with access and the selected roles. Use Edit Roles to change access or Disable to remove the integration.
Set up Snowflake
Set up has two parts: team owners first add the Snowflake account options for the team, then each member connects their own Snowflake user.
Team owners: configure the team account
Team owners can add the Snowflake account identifiers that members are allowed to connect.
This step only adds connection options for the team. Members still need to connect their own Snowflake user before v0 can access Snowflake data on their behalf.
v0 asks for the Snowflake account identifier portion of your Snowflake URL. For example, if your Snowflake URL is https://myorg-account123.snowflakecomputing.com, enter myorg-account123.
Use Snowflake's Account identifiers guide to find the right value. In Snowsight, open the account selector, choose View account details, and use the account identifier shown for your account. Do not include https:// or .snowflakecomputing.com when entering the value in v0.
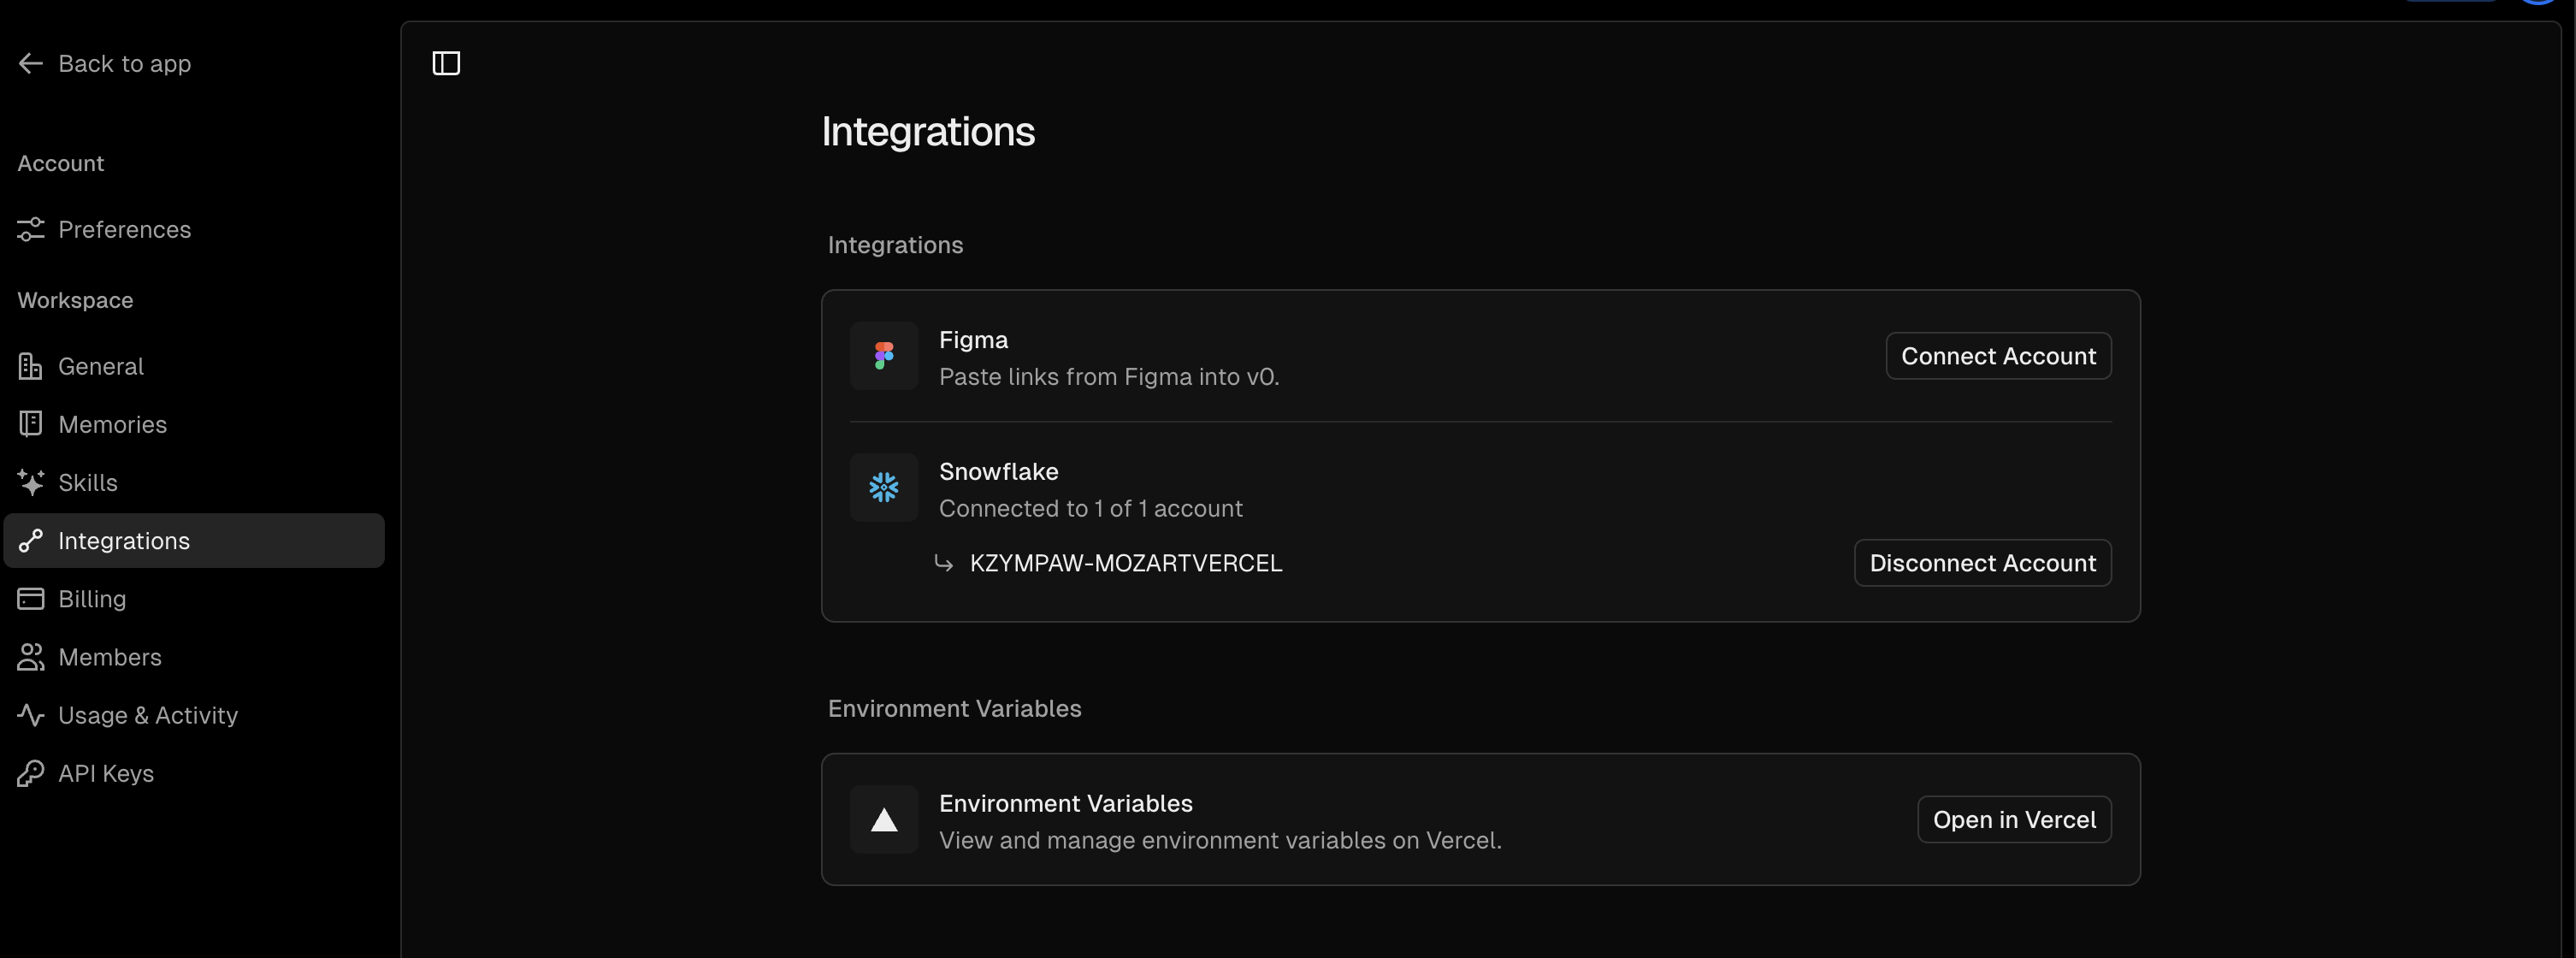
- Open your v0 team settings.
- Go to Integrations.
- Find Snowflake.
- Click Add Account.
- Enter the Snowflake account identifier.
- Optionally add a label, such as
ProductionorAnalytics.
Team members: connect your Snowflake user
After a team owner configures an account, any team member can connect their own Snowflake user from a prompt-generated integration card.
The connection card shows the required terms and permissions. By clicking Connect, you authorize v0 to access Snowflake through your selected role and allow v0 to send Snowflake integration usage information to Snowflake.
- Open a chat in the v0 team.
- Ask v0 to create something with Snowflake, such as
Create an application using Snowflake that shows AI gateway usage by models. - When v0 shows the Snowflake card, click Connect.
- Select the Snowflake account for the chat.
- Complete the Snowflake OAuth flow and choose a role with access to the data you want v0 to use.
You can also connect manually from the chat Connect panel by choosing Snowflake.
Build with Snowflake data
Ask v0 to inspect your Snowflake data before generating application code. This helps v0 use the exact database, schema, table, and column names available to your role.
Example prompts:
Inspect my Snowflake schemas and show me which tables look useful for a revenue dashboard.Build an analytics dashboard from Snowflake. First inspect the table schemas and sample rows, then use the confirmed columns.Create a report from MY_DATABASE.PUBLIC.ORDERS grouped by week. Validate the columns before writing the query.For generated applications, Snowflake queries must run on the server. v0 handles the connected Snowflake credentials for preview and deployment, so avoid putting Snowflake tokens in client-side code.
Explore tables and run SQL
Connected Snowflake chats can use v0's data tools to:
- Browse accessible databases, schemas, and tables.
- Preview table rows with pagination.
- Run custom SQL queries.
- Use query results as context for future prompts.
Large warehouses and broad queries can be slow or expensive. Prefer targeted queries, explicit database and schema names, and LIMIT clauses while exploring data.
Deploy to Snowflake
When a chat is connected to Snowflake, v0 shows a Snowflake publish flow.
- Click Publish.
- Click Deploy to Snowflake.
- Wait for v0 to package, build, and deploy the app.
- Use the publish menu to visit the app or copy the app URL.
After deployment, the app is hosted on Snowflake infrastructure. Deployment logs and details are available from the publish popover when Snowflake returns them.
Troubleshooting
Snowflake is not available
The integration is in beta and must be enabled for your team. A team owner also needs to add at least one Snowflake account identifier before members can connect.
I cannot see the tables I expected
v0 only sees the data available to your connected Snowflake role. Reconnect Snowflake and choose a role with the right warehouse, database, schema, and table permissions.
A teammate cannot preview my Snowflake app
Each member connects their own Snowflake account. Ask them to connect Snowflake from the prompt shown in the preview or from the Connect panel.
Deployment keeps failing during build
If a Snowflake deployment fails repeatedly, ask v0 to inspect Snowflake app events before trying another fix. Include the deployment error logs if you have them, then prompt v0 with:
My app is having an issue with deploying to Snowflake.
Use "snow app events" to check for issues on the Snowflake deployment.
Make changes needed to deploy the application.
Deployment fails after a Snowflake role change
Reconnect Snowflake and choose a role that has access to the required v0 integration procedures and deployment permissions. Then retry the deployment from the publish popover.